How to Install iPerf on Windows
There is no official iPerf3 installer for Windows, but one command gets you a maintained build:
winget install -e --id ar51an.iPerf3
If you prefer not to use a package manager, the manual route is to download a maintained third-party build as a zip, extract it to a folder, and run iperf3 from that folder in a terminal (or add the folder to PATH). Either way, allow it through Windows Defender Firewall if you run it as a server. The steps below cover both routes and the gotchas that catch people out.
iPerf measures raw network throughput between two machines you control, which makes it the honest tool for "the link is slow" claims: no browser, no third-party test server with moods, just your two endpoints. It is a staple for installers and network engineers, and it is command-line only.
Why is there no official Windows version?
iPerf3 is developed by ESnet, and its only officially supported platforms are Linux, FreeBSD, and macOS. ESnet does not support Windows or distribute Windows binaries, so everything you find for Windows is a third-party build, most of them compiled against Cygwin so the zip contains iperf3.exe together with one or more .dll files it needs. That is also the first gotcha: the exe does not work if you copy it somewhere without its DLLs. Keep the extracted folder together.
Be careful where you download from. Several sites that rank well for "iperf windows" carry builds that are years out of date. Prefer a maintained source: the community builds published on GitHub are current, and the major package managers pull from maintained sources too. Old 3.1.x-era builds have known measurement quirks on Windows and are worth avoiding.
Should you use iPerf3 on Windows at all?
A knowledgeable reader will point out that ESnet's own FAQ recommends iperf2 on Windows, and that Microsoft has published a piece titled Three Reasons Why You Should Not Use iPerf3 on Windows. Both are real, and both deserve a straight answer. Much of that criticism targets the stale 3.1.x build that circulated for years, whose bundled Cygwin DLL capped the socket buffer and skewed throughput readings; the current maintained builds fixed that, and Microsoft's own piece concedes that for generic throughput testing the Cygwin-based tool is fine, reserving its objections for lab benchmarking and simulating native application behaviour.
More practically, iperf2 and iPerf3 are separate, incompatible protocols, and the public server ecosystem and most modern tooling standardise on iPerf3, so if the thing you are testing against runs iPerf3, an iperf2 client is no use to you. The same applies to Microsoft's suggested alternatives, ntttcp and ctsTraffic: both need their own tool at each end and cannot talk to an iPerf server, which makes them lab tools for endpoints you control, not field tools for testing against real iPerf3 endpoints.
Use a current build, test against a server you control, and iPerf3 on Windows measures honestly.
How do you install it manually?
Download the Windows zip from a maintained source and extract it somewhere sensible, such as C:\Tools\iperf3. That is the entire installation. Open Terminal or PowerShell, change to that folder, and confirm it runs:
cd C:\Tools\iperf3
.\iperf3.exe --version
Running it from its own folder is fine for one-off terminal use, but to run iperf3 from anywhere you need the folder on PATH: Start, type "environment variables", edit Path under your user variables, add the iperf3 folder, then open a new terminal. Nexus Telemetry Pro finds iperf3 the same way, via PATH, so if you install manually and want Pro's iPerf client to work, this step is required. It is the one thing winget does for you that the zip does not.
How do you install it with a package manager?
The simplest working route on a current Windows machine is winget, which is built in, pulls a maintained community build, and handles PATH for you:
winget install -e --id ar51an.iPerf3
Open a new terminal afterwards and confirm, check, or remove it with:
iperf3 --version                       # confirm it works
winget list iperf3                     # see what is installed
winget uninstall --id ar51an.iPerf3    # remove it cleanly
If you use Chocolatey instead, choco install iperf3 from an elevated terminal gets you the same command-line tool.
How do you run a test?
iPerf needs two ends: a server and a client. On the machine acting as the server:
iperf3 -s
The first time you do this, Windows Defender Firewall will prompt, or the connection will silently fail if the prompt is missed. Server mode listens on TCP port 5201 by default, so allow iperf3 through the firewall for private networks, or add an inbound rule for port 5201. This is the single most common reason an iPerf test "does not work" on Windows.
On the client machine, point it at the server's IP address:
iperf3 -c 192.168.1.50
That runs a ten-second upload test from client to server. Add -R to reverse direction and test download, and -t 30 for a longer test. Testing in both directions matters on Starlink, where download and upload are very different beasts.
What about public iPerf servers?
They exist, and they are the least reliable part of the ecosystem. Public servers are frequently busy, rate-limited, or simply unreachable, so a failed test against one proves nothing about your connection. Treat public servers as a convenience when they work, and treat a server you control (a machine at the office, a VPS, a Raspberry Pi at the other end of the link) as the real measurement.
The easier route for Starlink testing
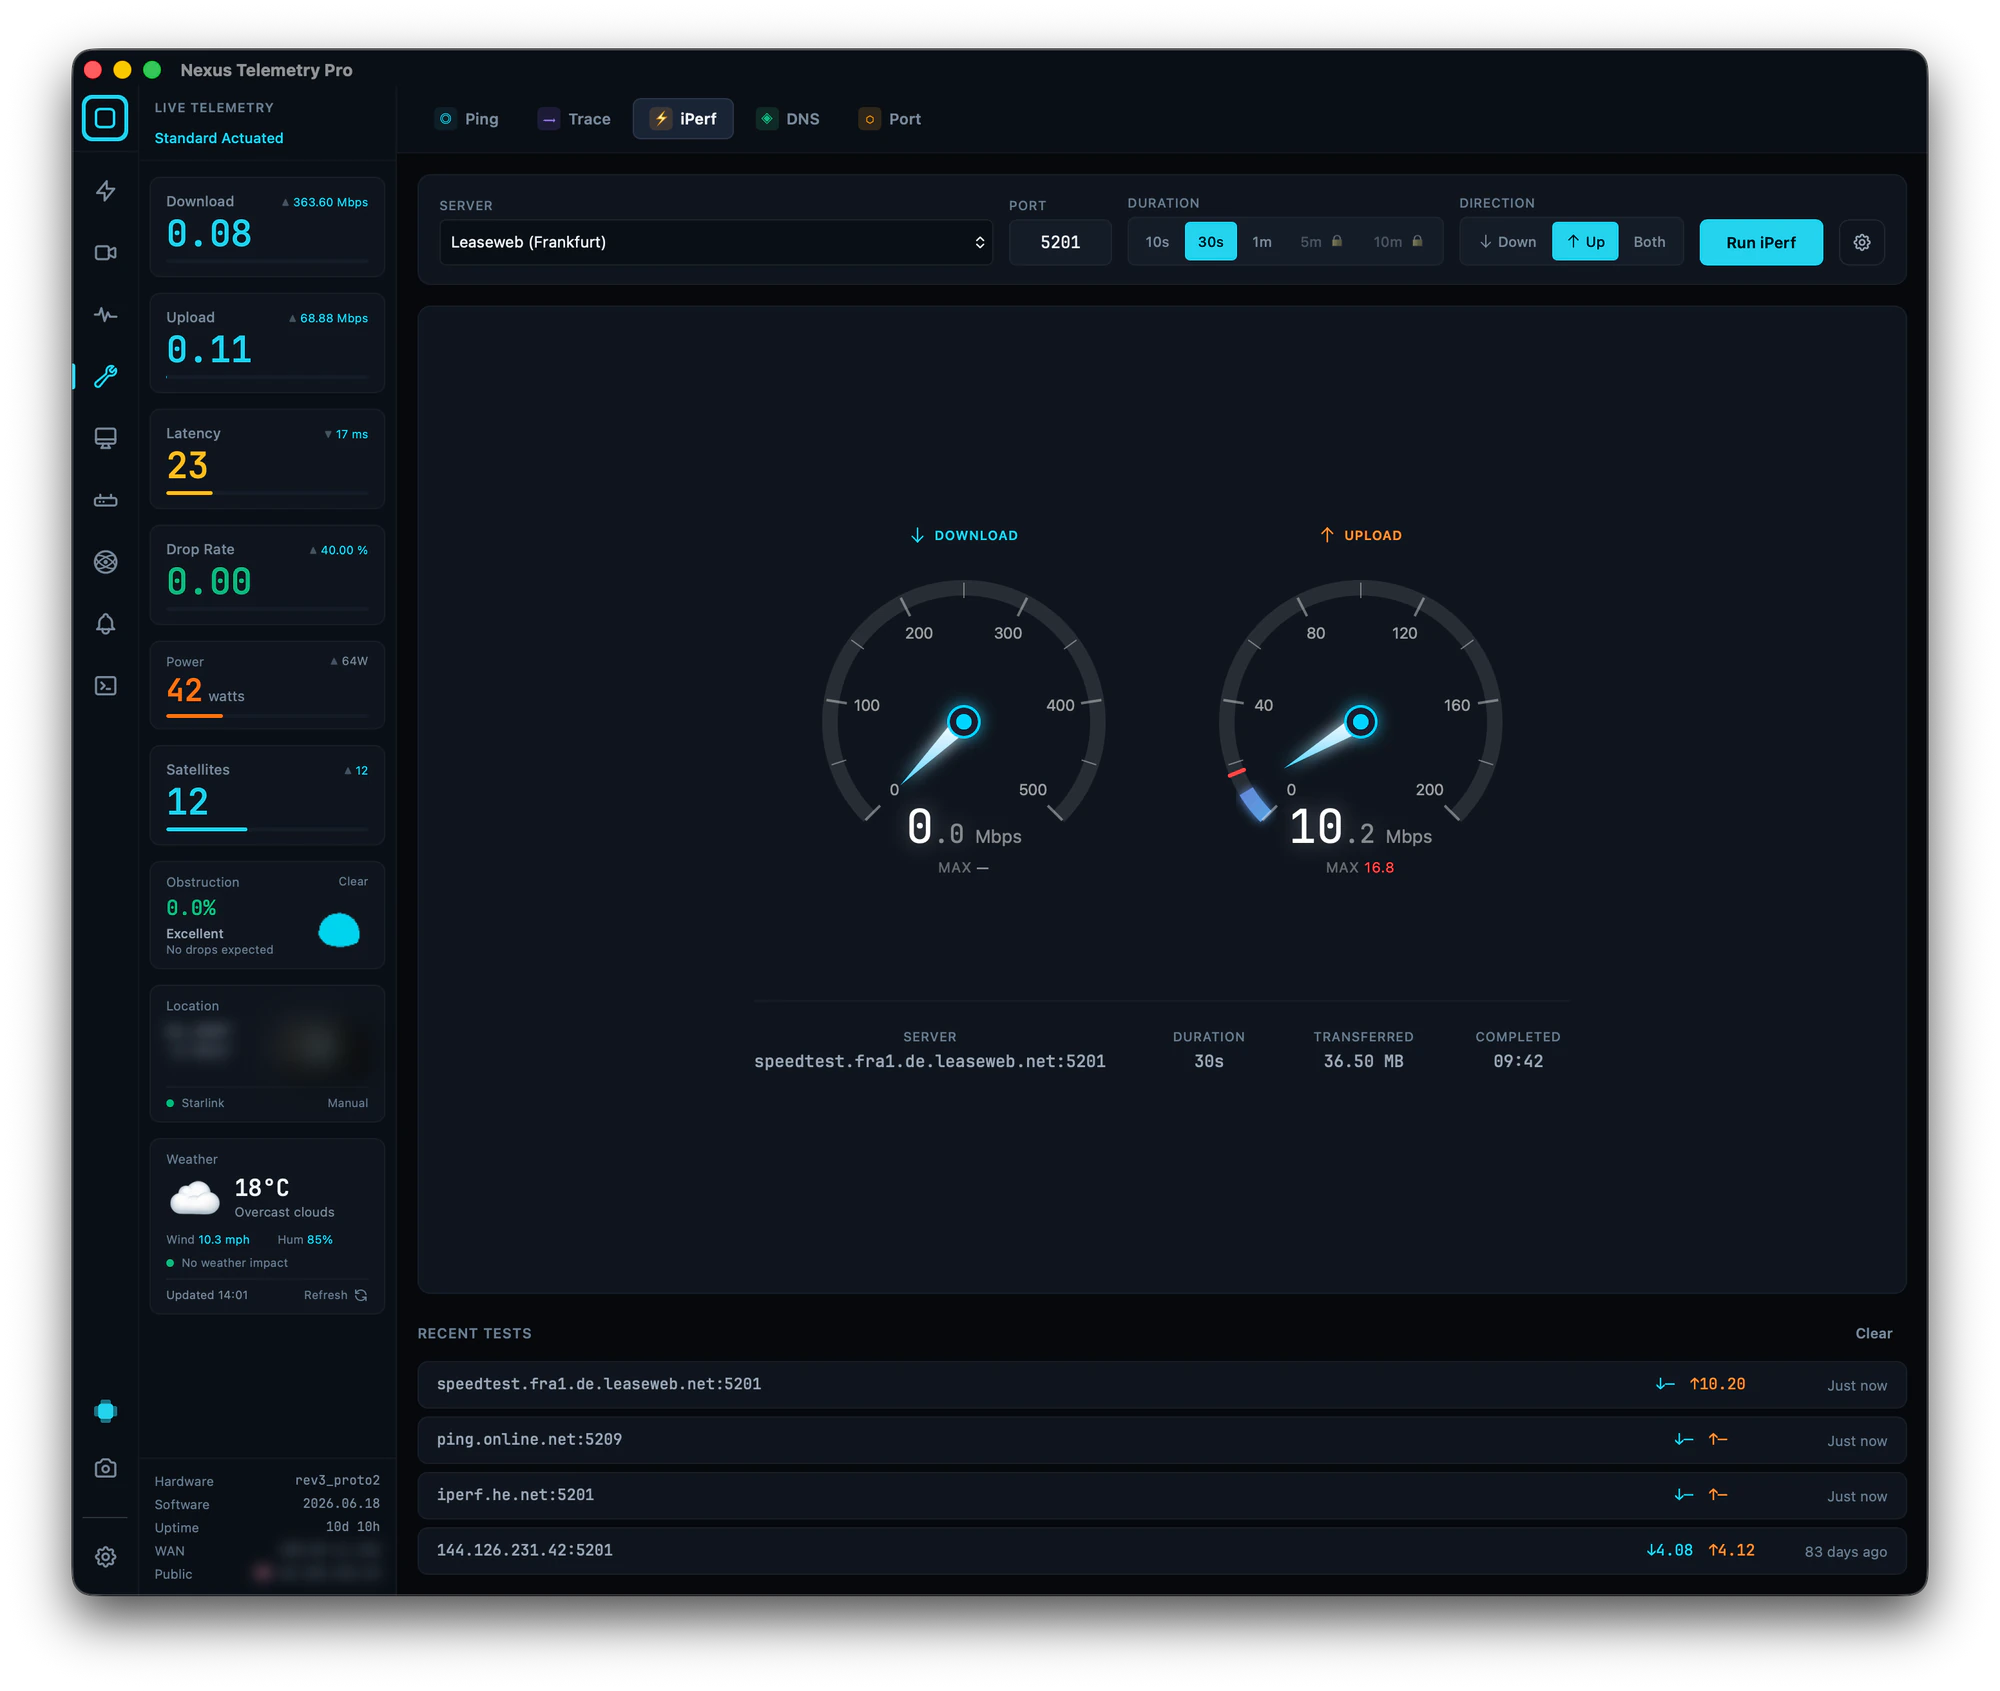
If the reason you want iPerf is testing a Starlink connection, Nexus Telemetry Pro has an iPerf client built into its diagnostics: pick a server, set the port, duration, and direction, and run it alongside ping, traceroute, DNS, and port checks, with recent results kept for comparison. Pro drives the iperf3 on your system, so install it first and make sure it is on PATH; the winget command above does both in one step. From there the results land in the same place as the rest of the connection's telemetry. The command-line tool remains the right choice when you control both ends and want scripted, repeatable runs.
Adding your own iPerf server
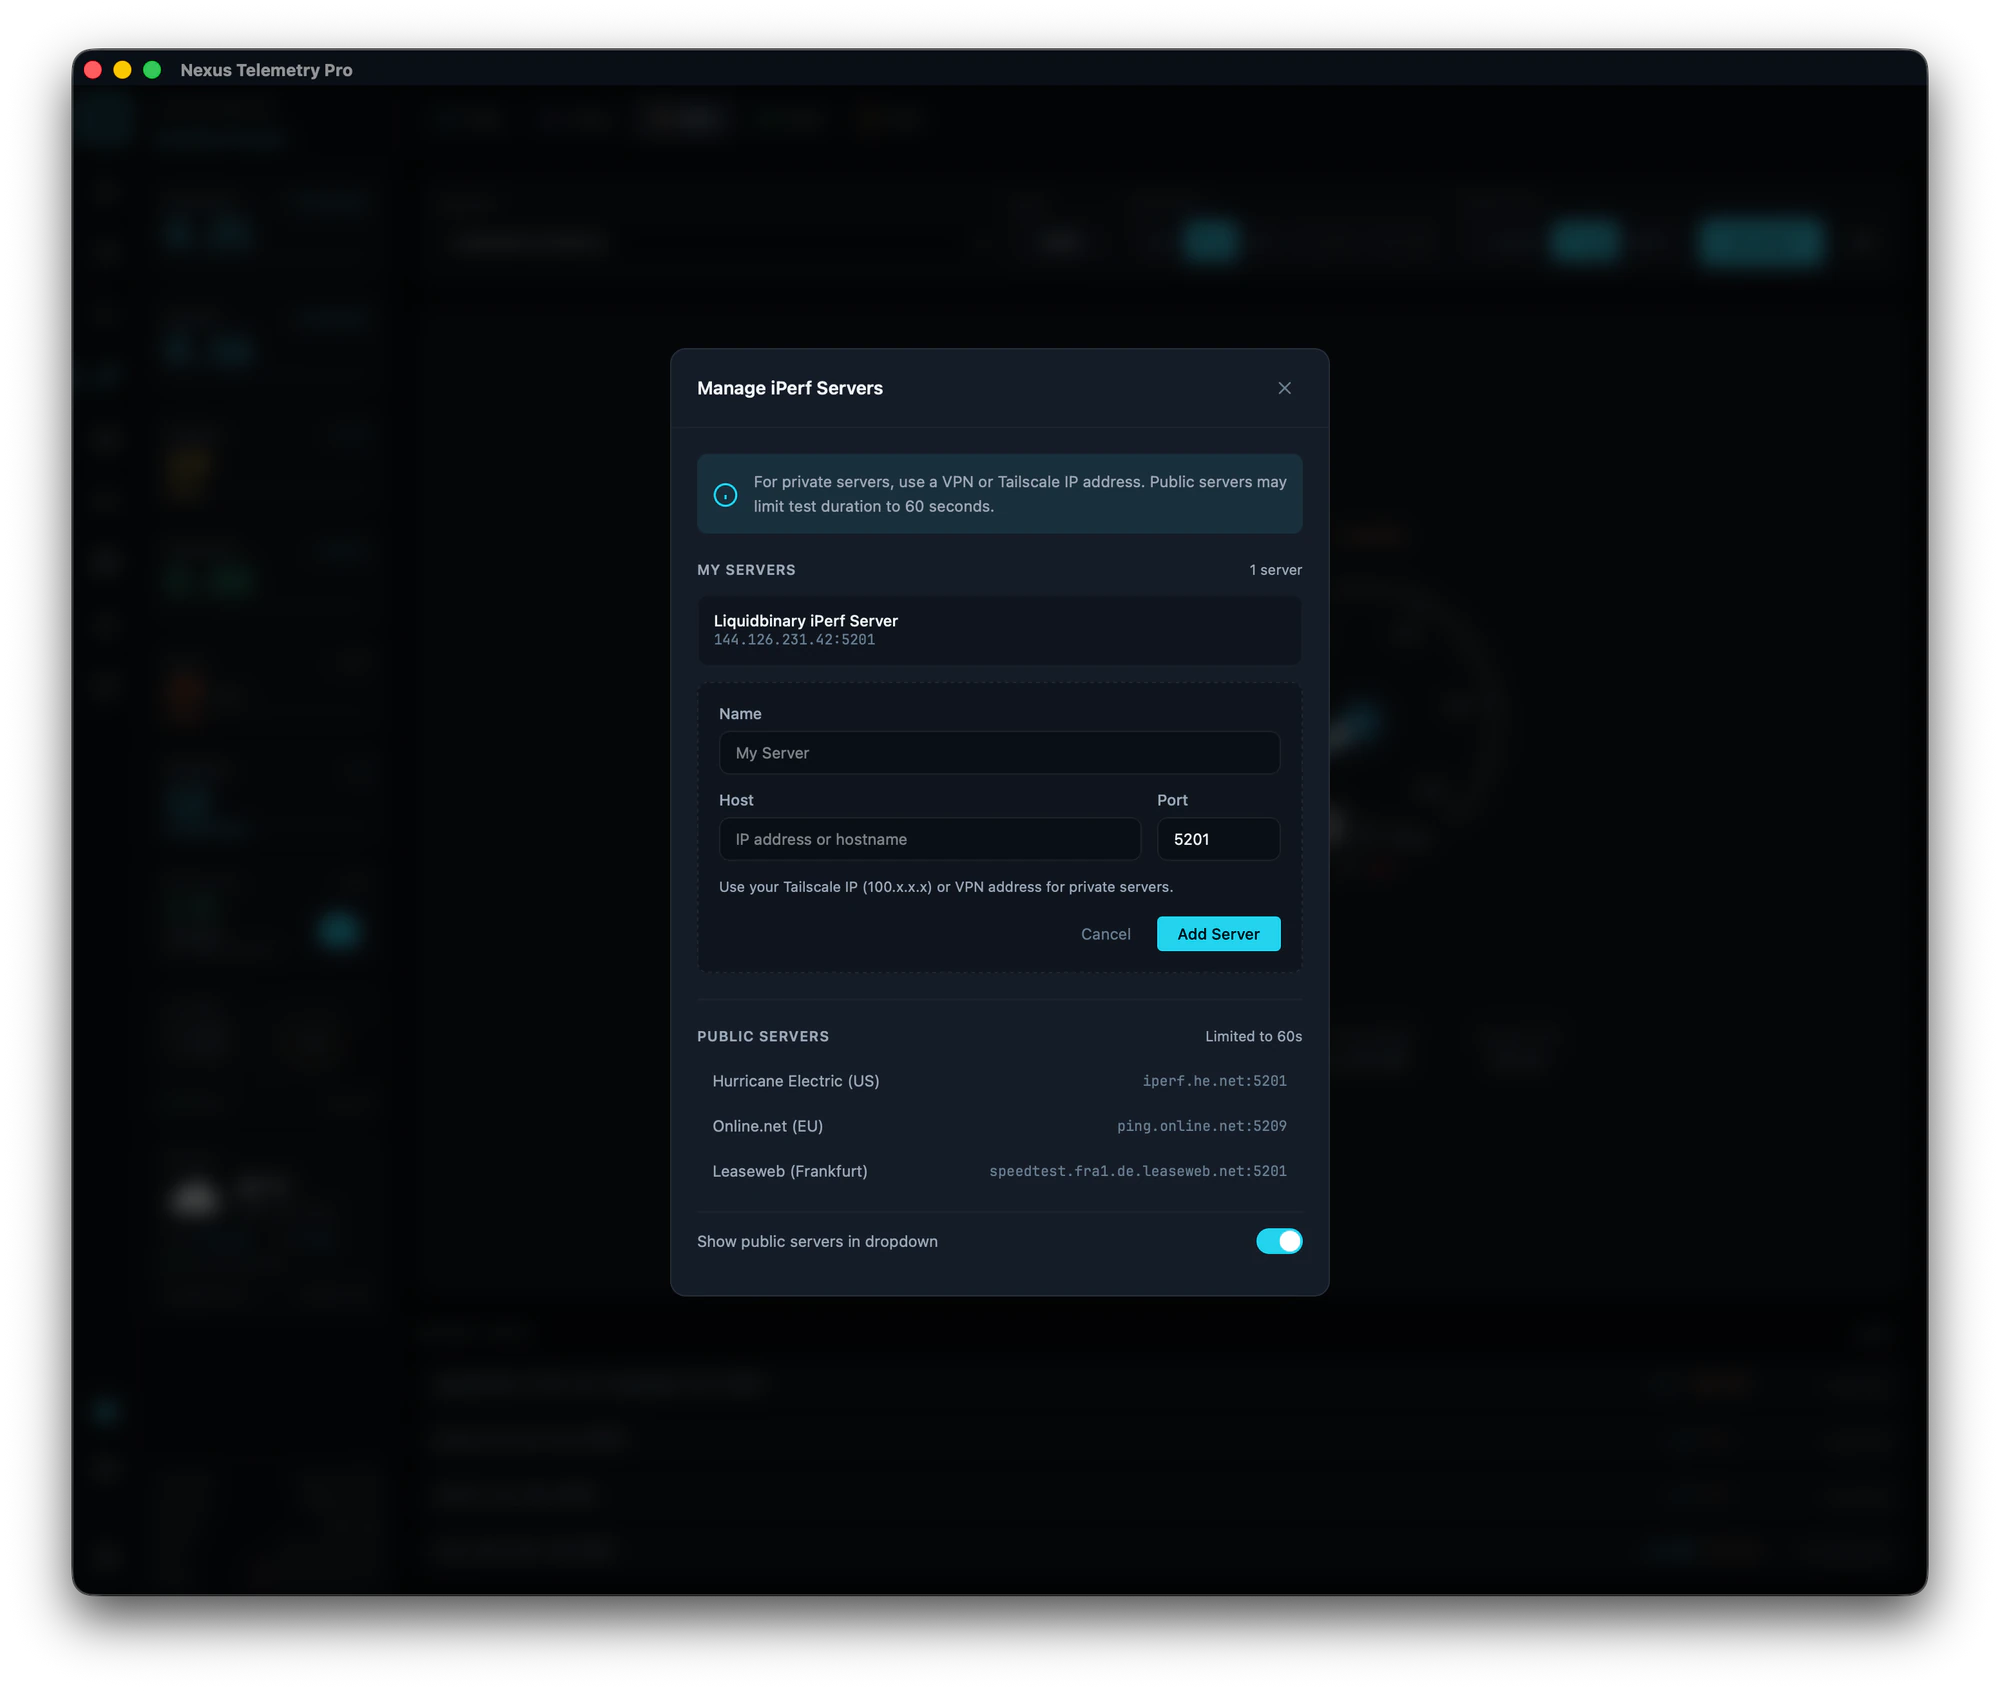
Because public servers are the unreliable part, Pro lets you keep a list of your own. Open Manage iPerf Servers, and under My Servers add one with a name, host, and port; it stays in the dropdown for every future test. The curated public servers sit below, behind a toggle and clearly marked with their 60-second cap, so a throttled result is never mistaken for a slow link.
One important point the dialog flags: iPerf runs with no authentication by default, so a server left reachable on the open internet is one anyone can run traffic against. Put it on Tailscale (100.x.x.x) or a VPN instead, so the overlay network restricts access to your own devices, and give Pro that address rather than a public one.
The short version
Download a maintained third-party build as a zip, extract it to a folder, and run iperf3 from a terminal in that folder, adding the folder to PATH so it works everywhere (and so Nexus Telemetry Pro can find it). Simpler still, one command does the whole job, PATH included:
winget install -e --id ar51an.iPerf3
Allow it through the firewall before running as a server, keep the DLLs next to the exe, avoid stale downloads, and distrust public servers. For Starlink diagnostics, Pro wraps the same iperf3 in a client with a server picker and result history.
Part of Starlink for Installers and Professionals. Nexus Telemetry is built by Liquidbinary Ltd, the team behind one of the first Starlink Enterprise management platforms. Pro runs natively on Windows, macOS, and Linux with a free trial.