How to Do a Starlink Site Survey
The reliable way to survey a Starlink mount location is to check it with the Starlink app's obstruction tool before you mount, from the exact spot and height the dish will sit, and commit the mount once that view is clear and everything else checks out. A mount moved a metre at survey costs nothing. Then let the dish build its own obstruction map in place, a first pass in about an hour on current firmware and settled within a day, and check it back to confirm the result and catch anything the quick scan missed. This guide covers the app check, the post-install map and when to trust it, and the judgement calls for marginal sites.
Start with the Starlink app's obstruction check
This is the tool Starlink gives you to choose the location, so use it before you drill. Open Check for Obstructions, select your hardware so the app scans the correct field of view, and scan the sky with the phone camera held at the exact spot and height the dish will occupy. Work through every candidate position this way, ground-level spots, roof edges, poles, a wall mount, and pick the one that shows a clear field. When the position you want reads clean and the cable run and mounting both work, commit it.
The discipline that matters is where you scan from. The app estimates from where you hold the phone, so a scan from the driveway says nothing about the roof peak. Scan from the actual mount point, at mounting height, or the reading is fiction. Done properly, the app is a sound basis to mount on, which is what Starlink intends it for.
How long does the dish's obstruction map take to build?
A first usable map in about an hour, settled over the first day. Once the dish is mounted and running, it builds its own obstruction map from what it actually sees satellite to satellite, shown on the app's home screen. On current firmware the app treats the first hour as calibration and draws an initial map in roughly that time, which gives you an early read before you leave site. An hour of satellite passes cannot have swept the whole field of view, though: Starlink's guidance remains that most obstructions are detected within the first day and that the map keeps updating continuously as it runs. So treat the first map as an early read, and the next-day map as the confirmation you sign off on. What you want to see is 0% obstruction with a clean field. What sends you back to the mount is any persistent blockage sector, however small the headline percentage, particularly towards the busy part of the sky for your latitude.
Because the map is measured over time across the whole field of view, it catches the marginal branch or mast edge a single pre-install scan can miss. That is why you come back to it: proof the placement holds up in practice, and early warning when it does not.
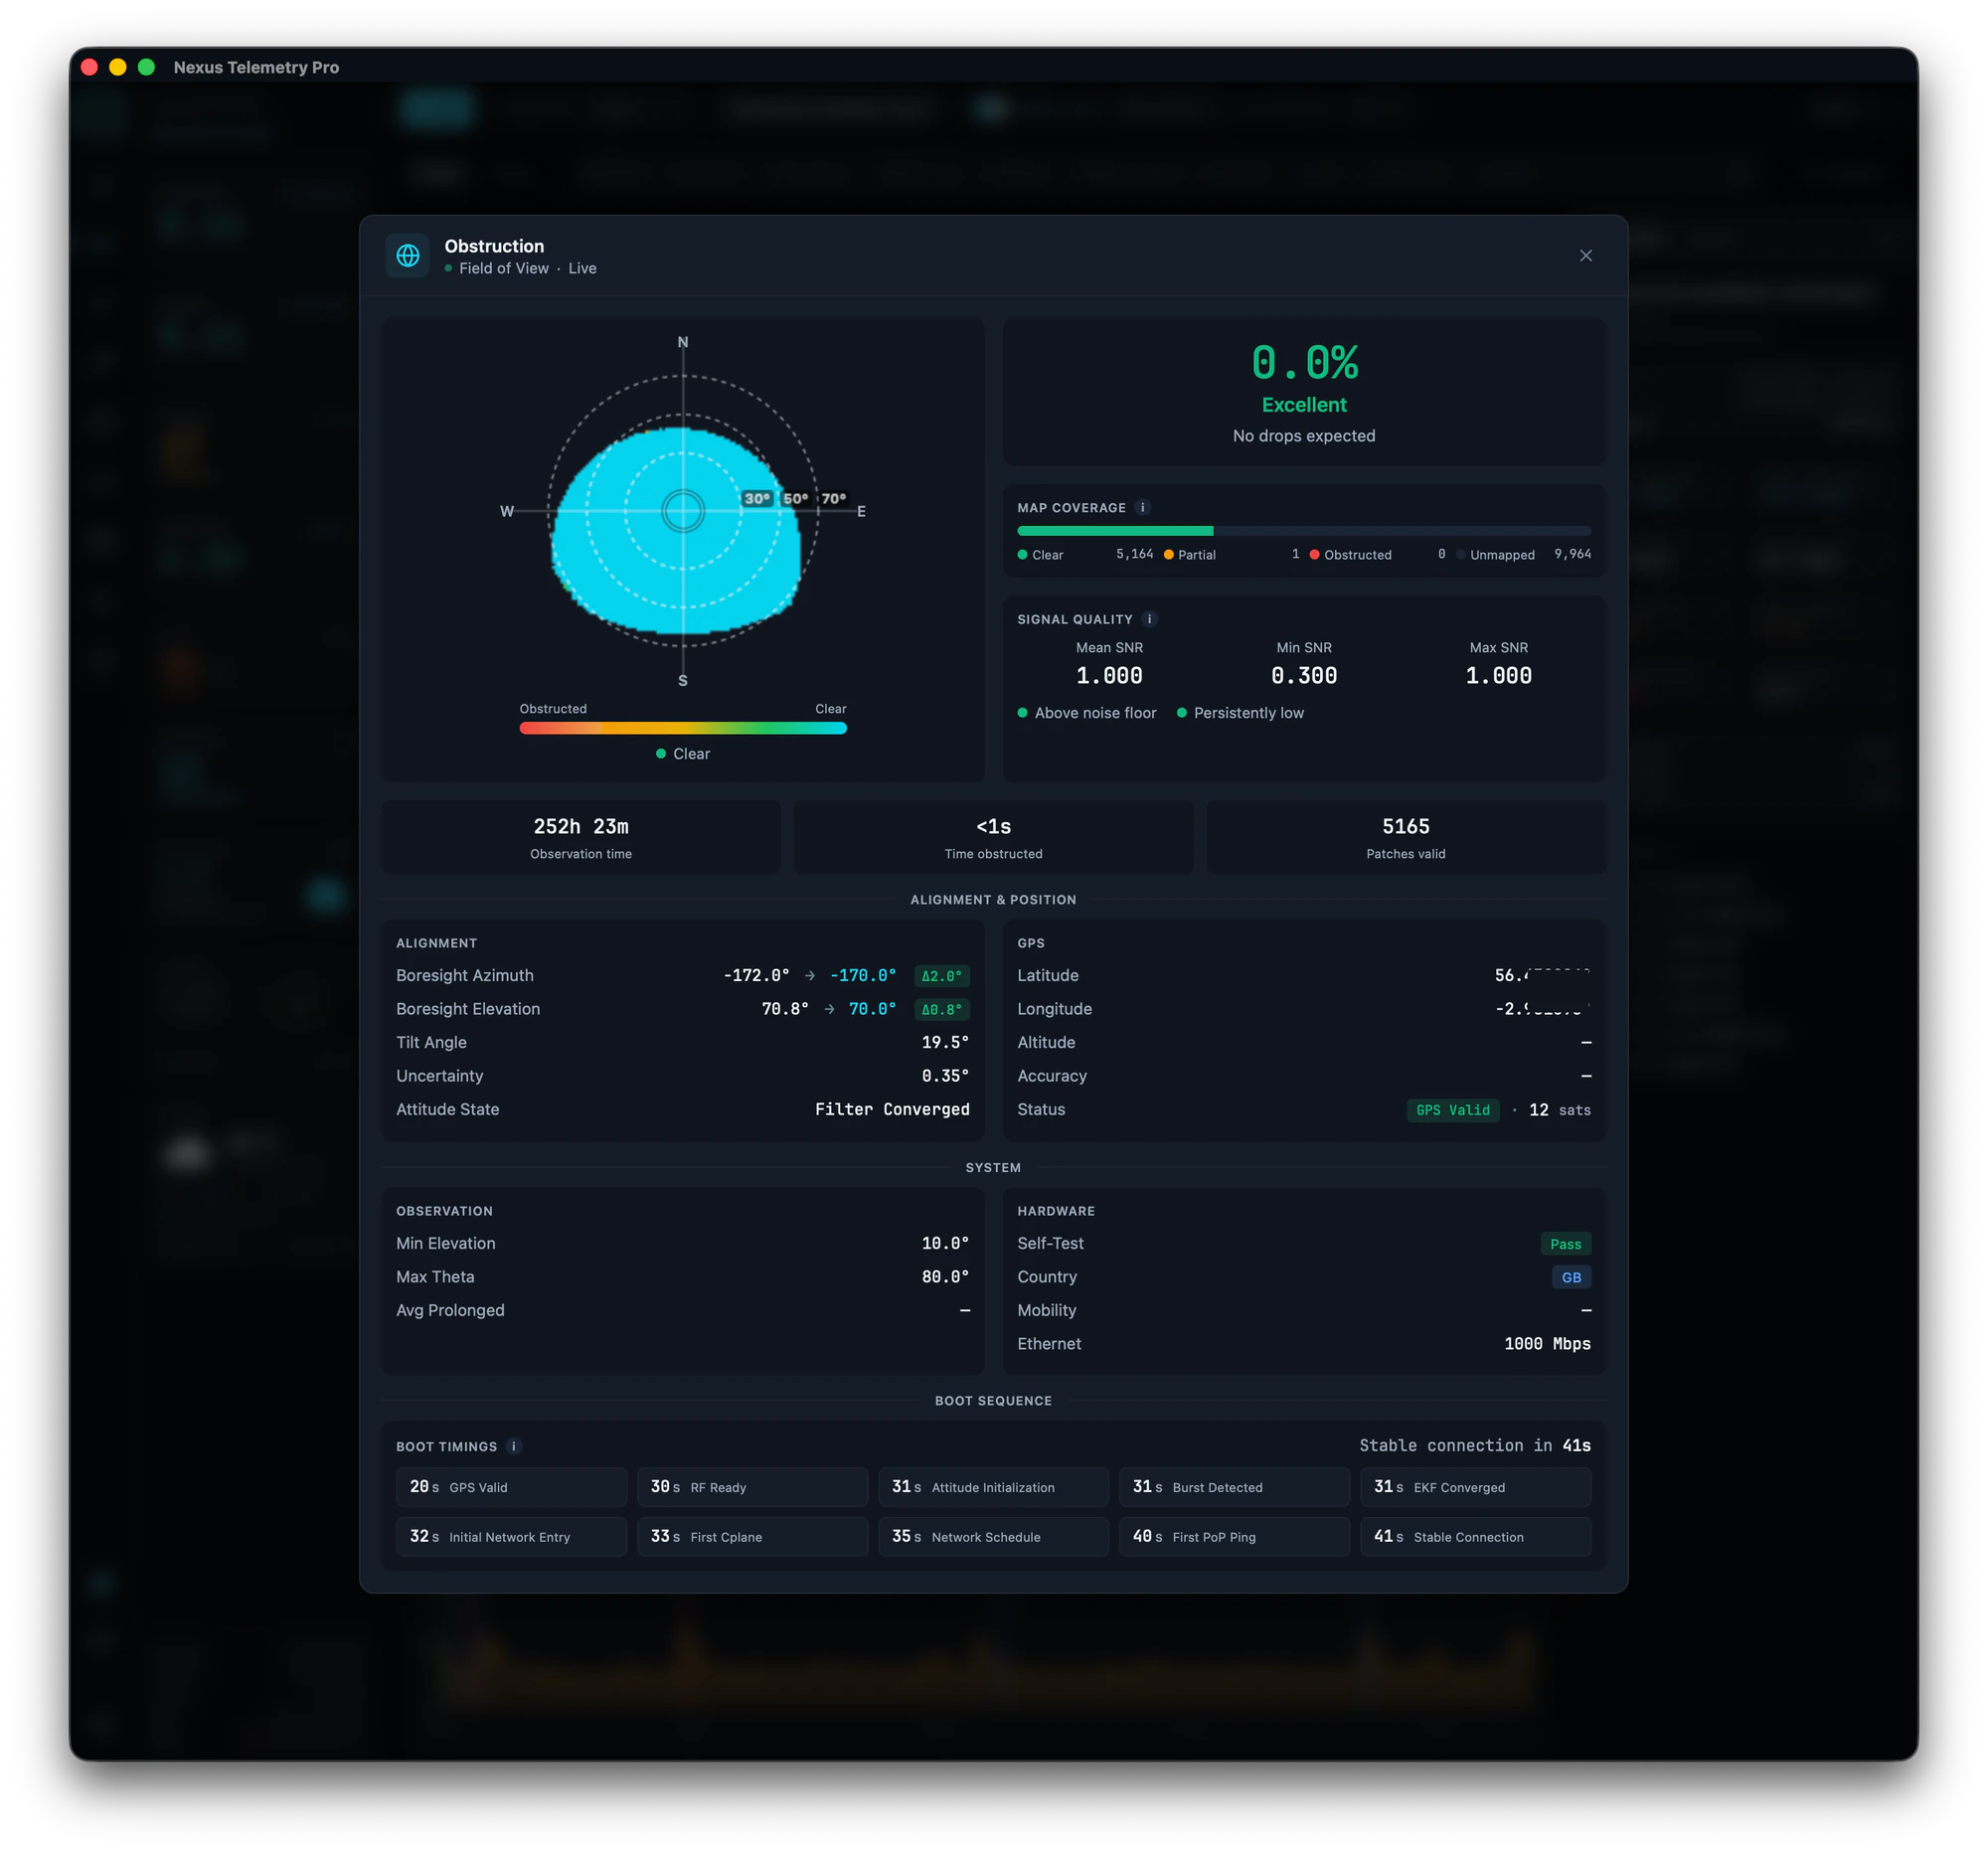
The app gets the dish sited and aligned; confirming that the position actually holds up is the diagnostics job, and it is the one thing the app does not keep a record of. In Nexus Telemetry Pro the live obstruction view sits alongside drop rate and the event log, which is the combination that matters: a site can show a low obstruction percentage while the event log quietly accumulates sub-second no-downlink warnings, and that pattern is the signature of a blockage the map has not fully drawn yet.
What makes a good mount position?
The sky requirements are unforgiving and everything else is trade-offs. Starlink's own install guidance is blunt: the dish must be 100% unobstructed for best performance, with a clear view of the sky from around 20° above the horizon through a full 360° of rotation, and even small obstructions cause intermittent outages and dropped packets.
Within that clear view, the current dishes see a cone of sky, about 110° for the standard Gen 3 and Mini and 140° for the flat High Performance model, and within the cone the satellites concentrate in one part rather than spreading evenly. Which part depends on your latitude, so the US rule of thumb of pointing it north does not travel: the app's scan settles it by drawing the exact cone for your location and hardware. What holds everywhere is that a blockage in the busy arc costs a dropout every time a satellite crosses behind it, so a small obstruction in the wrong place matters more than a larger one off to the side.
Height helps only insofar as it clears obstructions, which is also why Starlink suggests elevated installs on a pole, pedestal, or rooftop: a lower position with a clean sky still beats a higher one that clips a tree line. Think in seasons: a deciduous tree that is bare in February is a wall of leaves in July, and vegetation grows, so a position that is marginal today will be obstructed next year.
On vessels, rigging, masts, and radar arcs are the usual offenders, and the survey is worth repeating on more than one heading, because a blockage dead ahead on one course swings across the busy sky on another.
Cable run, serviceability, and wind loading matter too, but they are recoverable problems. An obstructed sky is not.
How do you record the survey for the quote?
Record the chosen position as a session and it becomes part of the job file. Start a recording once the dish is powered in position, and the session captures drop rate, latency, and the event log, with the obstruction figure filling in as the map matures over the following day. Use the app's quick check to compare candidate positions on the day, then let the session and the next day's matured map document the one you commit to, and the exported PDF drops straight into the quote. The same recording workflow then carries through commissioning and handover.
How to verify a Starlink installation →
What if no position is perfect?
Be honest in the quote, because the telemetry will be honest later. Some sites do not have a clean sky, and the professional move is to document the best achievable position, state the expected consequence (brief dropouts when satellites cross the blocked sector), and let the customer decide with the map in front of them. An installer who says "this site will show around 1% obstruction and here is what that means" keeps the customer. An installer who says "it'll be fine" inherits the fault report.
For the mechanics of reading and fixing obstruction after installation, see the obstruction troubleshooting guide.
The short version
Check every candidate position with the app's Check for Obstructions, scanning from the exact spot and height the dish will sit, and mount on the one that reads clean. Once it is running, the dish draws a first obstruction map within about an hour and settles it over the first day: check the early read before you leave, come back the next day to confirm it is genuinely clear, and reposition if it is not. Accept only a clean field or document the compromise honestly. Record the chosen position as a session so the evidence lands in the quote, and repeat on multiple headings for vessels.
Part of Starlink for Installers and Professionals. Nexus Telemetry is built by Liquidbinary Ltd, the team behind one of the first Starlink Enterprise management platforms. Pro runs natively on Windows, macOS, and Linux with a free trial.